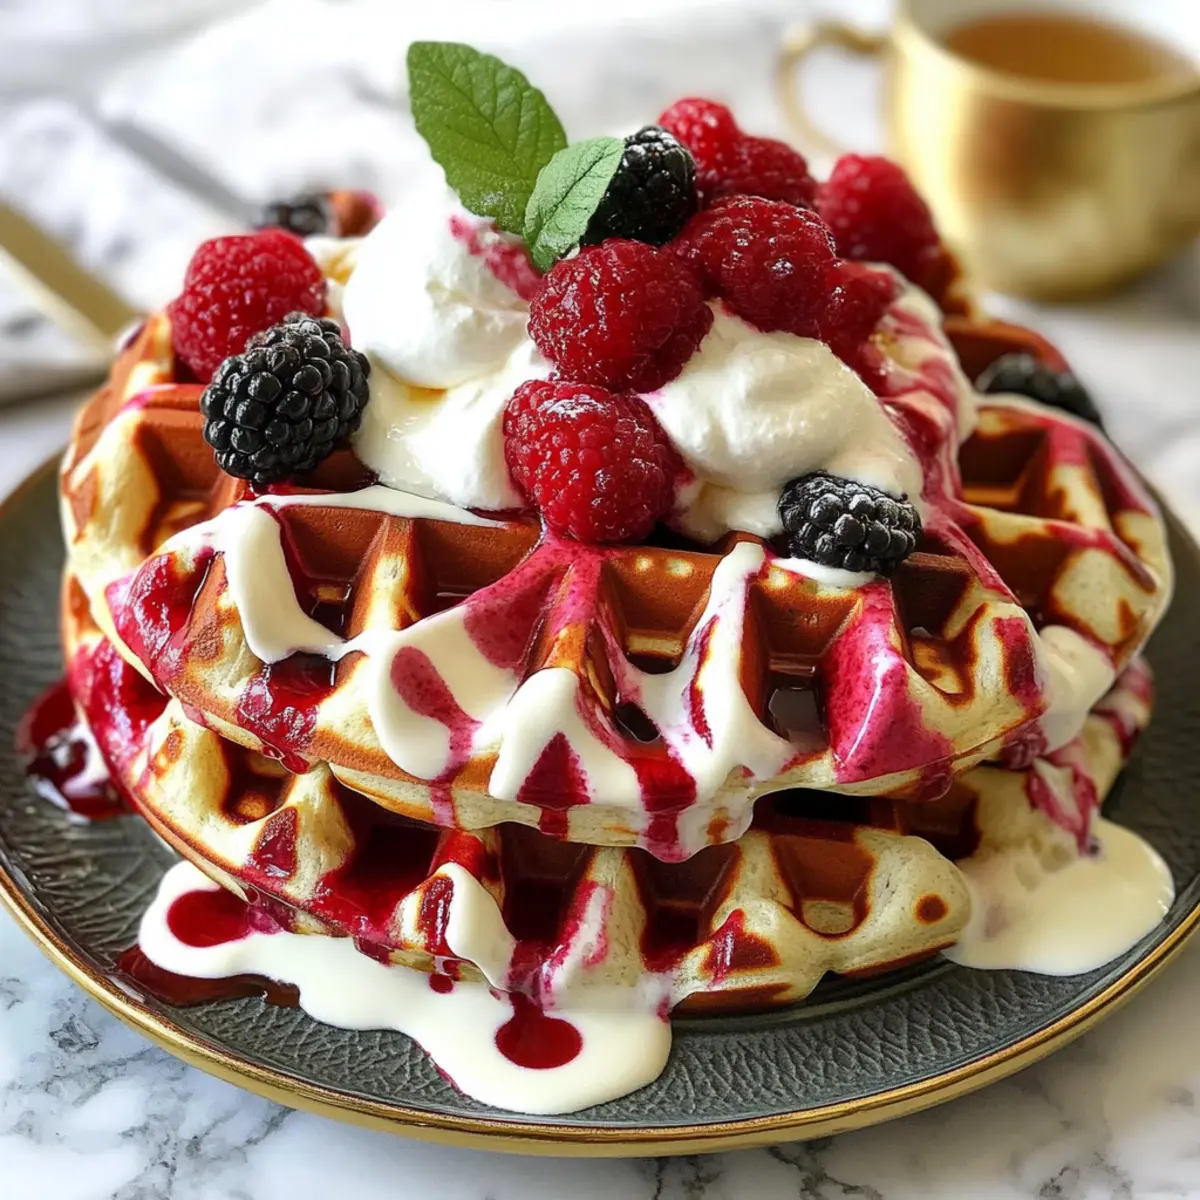
The aroma wafting through the kitchen is a delightful mix of cocoa and sweetness, hinting at a breakfast experience like no other. Let me introduce you to my latest obsession: Red Velvet Marble Waffles! This imaginative twist on a breakfast classic brings together two irresistibly fluffy batters—rich red velvet and traditional waffle—creating a stunning marbled effect that’s as pleasing to the eyes as it is to the palate. One of the best perks of this recipe is its quick prep time, ensuring you can whip up a festive brunch treat without spending hours in the kitchen. Plus, these waffles strike the perfect balance, not being overly sweet while still satisfying your indulgent cravings. So, are you ready to impress your loved ones with show-stopping waffles that are bound to brighten any morning? Let’s dive in!

Why are these waffles so special?
Indulgent, these Red Velvet Marble Waffles offer a delightful twist on breakfast classics, blending rich red velvet with fluffy traditional batter for a stunning visual and flavor experience. Quick and Easy, with simple ingredients and minimal prep time, you’ll be enjoying these delicious treats in no time. Versatile, serve them topped with whipped cream, fresh berries, or a drizzle of maple syrup for a festive touch at brunch gatherings. Crowd-Pleaser, perfect for impressing family and friends, these waffles will make any occasion feel special. If you’re looking for more delightful recipes, check out my Roasted Red Pepper Hummus or even a savory Chicken Alfredo Garlic Bread.
Red Velvet Marble Waffle Ingredients
For the Classic Batter
- All-Purpose Flour – Provides structure and texture; substitute with gluten-free flour for a gluten-free option.
- Sugar – Adds sweetness; can reduce for a less sweet flavor or use a sugar alternative.
- Baking Powder – Acts as a leavening agent; essential for achieving fluffiness in your waffles.
- Baking Soda – Works with the acidity of buttermilk to help the batter rise.
- Salt – Enhances flavor; use sea salt for a different taste dimension.
- Buttermilk – Adds moisture and tanginess; can be replaced with milk and vinegar (1 cup milk + 1 tbsp vinegar).
- Eggs – Provides richness and binding; can substitute with flaxseed meal for a vegan option.
- Melted Butter – Adds a touch of richness; use coconut oil for a dairy-free version.
- Vanilla Extract – Enhances flavor; consider almond extract for an alternative flavor profile.
For the Red Velvet Batter
- All-Purpose Flour – Same as classic; provides structure.
- Cocoa Powder – Gives that delightful chocolate flavor; essential for the red velvet profile.
- Sugar – Sweetens the batter; similar to the classic version.
- Baking Powder – Serves the same leavening purpose as in the classic batter.
- Baking Soda – Works to help the batter rise alongside buttermilk.
- Salt – Same flavor-enhancing purpose as classic.
- Buttermilk – Provides moisture and tanginess; just like in the classic batter.
- Eggs – Ensures richness and binding; mirrors the classic recipe.
- Melted Butter – Functionally the same as in the classic version.
- Vanilla Extract – Flavor enhancer; keeps consistent with the classic recipe.
- Red Food Coloring – Gives that signature red velvet hue; can be omitted for classic waffles.
These Red Velvet Marble Waffles are sure to bring joy and delight to your breakfast table!
Step‑by‑Step Instructions for Red Velvet Marble Waffles
Step 1: Prepare Classic Waffle Batter
In a medium bowl, whisk together 2 cups of all-purpose flour, 1/4 cup of sugar, 1 tablespoon of baking powder, 1 teaspoon of baking soda, and a pinch of salt. In another bowl, mix 1 1/2 cups of buttermilk, 2 large eggs, 1/2 cup of melted butter, and 1 teaspoon of vanilla extract until well combined. Gently fold the wet ingredients into the dry ingredients until just combined, creating a smooth classic waffle batter.
Step 2: Prepare Red Velvet Batter
In a separate mixing bowl, combine 1 1/2 cups of all-purpose flour, 1/4 cup of cocoa powder, 1/4 cup of sugar, 1 tablespoon of baking powder, 1 teaspoon of baking soda, and a pinch of salt. In another bowl, whisk together 1 cup of buttermilk, 1 large egg, 1/2 cup of melted butter, 1 teaspoon of vanilla extract, and 1 tablespoon of red food coloring. Mix the wet ingredients into the dry ingredients until just combined, forming a rich red velvet batter.
Step 3: Preheat Waffle Iron
Preheat your waffle iron according to the manufacturer’s instructions, typically set to a medium-high heat. Lightly grease the cooking surface with cooking spray or melted butter to prevent sticking. This step is essential for achieving that crispy exterior while maintaining a fluffy inside for your Red Velvet Marble Waffles.
Step 4: Create Marbled Effect
Once your waffle iron is ready, carefully pour alternating spoonfuls of both the classic and red velvet batter onto the center of the hot iron. Use a toothpick or knife to swirl the two batters together gently without completely mixing them. This technique creates the beautiful marbled effect that makes these waffles visually stunning.
Step 5: Cook Waffles
Close the waffle iron and cook for about 4 to 5 minutes or until the waffles are golden brown and steam is no longer escaping from the edges. The cooking time may vary depending on your waffle iron, so keep an eye on them to ensure they don’t overcook. The combination of the batters will deliver a delightful blend of flavors.
Step 6: Serve
Once cooked, carefully remove the waffles from the iron and serve warm. They pair beautifully with toppings like whipped cream, fresh berries, or a drizzle of maple syrup. Presenting your gorgeous Red Velvet Marble Waffles topped with your favorite ingredients will surely impress your family and friends at breakfast or brunch!

Storage Tips for Red Velvet Marble Waffles
Room Temperature: Store uneaten waffles at room temperature for up to 2 hours; cover with a clean kitchen towel to retain moisture.
Fridge: Keep leftovers in an airtight container in the refrigerator for up to 2 days. This helps maintain their fluffy texture.
Freezer: Freeze waffles in a single layer before transferring to a freezer bag for up to 2 months. Reheat from frozen in a toaster or oven for optimal crispness.
Reheating: For the best results, reheat waffles in a toaster or on a waffle iron until warm and crispy, restoring their delightful texture. Enjoy your delicious Red Velvet Marble Waffles once more!
Expert Tips for Red Velvet Marble Waffles
-
Batter Consistency: Ensure both batters are of similar thickness. This helps achieve a perfect marbled effect without one batter overpowering the other.
-
Avoid Overmixing: Gently fold the ingredients until just combined. Overmixing can lead to dense waffles instead of the light and fluffy texture we want for Red Velvet Marble Waffles.
-
Grease Wisely: Lightly grease the waffle iron to prevent sticking, but avoid using too much oil, which can lead to soggy waffles.
-
Monitor Cooking Time: Every waffle iron is different. Check your waffles 1-2 minutes before the suggested time for optimal doneness, avoiding overcooked, dry waffles.
-
Customization: Feel free to be creative! Add chocolate chips or nuts to either batter to elevate the flavor of your Red Velvet Marble Waffles.
Red Velvet Marble Waffles Variations
Feel free to explore exciting twists for your Red Velvet Marble Waffles that can ignite your creativity in the kitchen!
-
Gluten-Free: Use a 1:1 gluten-free flour mix in place of all-purpose flour for a delightful treat that everyone can enjoy. There’s no reason to miss out on the fun!
-
Dairy-Free: Substitute buttermilk with almond milk mixed with lemon juice to keep this recipe friendly for lactose sensitivities. The tanginess will still shine through beautifully.
-
Egg-Free: Replace eggs with 1/4 cup of unsweetened applesauce for a vegan version that keeps the waffles moist and delicious. It’s a wonderful way to keep those flavors intact!
-
Flavor Boost: Add a teaspoon of cinnamon or nutmeg to either batter for a warm and inviting spice that amplifies the cozy feel of your breakfast. It’ll be a real crowd-pleaser at brunch!
-
Chocolate Lovers: Swap out the red velvet batter for a double chocolate version by adding extra cocoa powder and chocolate chips. For these chocoholics, the more chocolate, the better!
-
Fruit Infusion: Fold in some fresh blueberries or raspberries into your batters for a fruity burst of flavor. The color contrast will add a lovely visual flair too!
-
Maple Twist: Use pure maple syrup in place of sugar for a warm, earthy sweetness that aligns beautifully with the flavors of the batter. Drizzle some on top for that extra indulgence.
-
Nutty Crunch: Incorporate finely chopped nuts like walnuts or pecans into either batter for a delightful crunch that beautifully balances the soft texture of the waffles. It’s a delightful surprise with every bite!
With these variations, you can not only customize your waffles but also cater to diverse dietary needs and flavor preferences. Each twist brings its own charm, just like my favorite Red Velvet Marble Waffles!
What to Serve with Red Velvet Marble Waffles
Elevate your breakfast experience with delightful accompaniments that enhance these stunning waffles!
-
Whipped Cream:
Light and fluffy, whipped cream adds an airy texture that complements the richness of the waffles perfectly. A dollop on top makes them feel extra indulgent. -
Fresh Berries:
Juicy strawberries, blueberries, or raspberries provide a burst of freshness and slight tartness, balancing the sweetness of the waffles—a match made in heaven! -
Maple Syrup:
Drizzling warm maple syrup over the waffles adds a touch of caramel-like sweetness that melds beautifully with the cocoa notes in the red velvet. -
Nutella or Chocolate Sauce:
For chocolate lovers, a drizzle of Nutella or rich chocolate sauce amps up the indulgence factor. It creates a decadent treat that’s hard to resist! -
Ice Cream:
For a special treat, serve a scoop of vanilla or chocolate ice cream beside the waffles. The creaminess combines delightfully with the fluffy texture. -
Coconut Flakes:
Toasted coconut flakes introduce a delightful crunch, adding an exotic flair to every bite, and harmonizing with the cocoa elements of the waffles. -
Coffee or Hot Chocolate:
Pair with a warm cup of coffee or velvety hot chocolate to elevate your breakfast or brunch experience, offering cozy sips alongside your vibrant waffles.
Make Ahead Options
These Red Velvet Marble Waffles are an ideal choice for those looking to save time during busy mornings! You can prepare both waffle batters up to 24 hours in advance by combining the dry ingredients in one bowl and the wet ingredients in another; simply refrigerate them separately. To maintain the quality, cover the bowls tightly to prevent any moisture from affecting the texture. When you’re ready to cook, allow the batters to come to room temperature for about 15-20 minutes, then swirl the batters together as directed and cook in the preheated waffle iron. This method allows you to serve a delicious and impressive breakfast with minimal effort!

Red Velvet Marble Waffles Recipe FAQs
How do I select ripe and fresh ingredients for this recipe?
Absolutely! When selecting buttermilk, look for a fresh date on the carton. For eggs, give them a gentle shake; if you hear any sloshing, they may be past their prime. For flour, check that there are no clumps or an off smell. Fresh baking powder and baking soda should yield a light, airy texture, so always double-check the expiration dates.
What’s the best way to store leftover Red Velvet Marble Waffles?
Very! After cooling, place uneaten waffles in an airtight container and store them in the refrigerator for up to 2 days. For longer storage, I recommend freezing them. Use parchment paper between layers to prevent sticking, and they can stay fresh for up to 2 months. When you’re ready to enjoy them again, just reheat in a toaster for that perfect crisp!
Can I freeze the batter for these waffles?
Yes, you can! To freeze the batter, simply separate it into two airtight containers—one for the classic batter and another for the red velvet batter. You can store them in the freezer for up to 3 months. When you’re ready to use, thaw them overnight in the refrigerator. Give them a gentle stir before using to restore their consistency.
What should I do if my waffles turn out dense or soggy?
No worries! If your waffles are dense, it may be due to overmixing the batter. Remember, gently folding the wet and dry ingredients until just combined is key. For soggy waffles, check that your waffle iron is hot enough before adding the batter. Cooking times can vary, so keep an eye on them to ensure they’re golden brown and cooked through.
Are there any dietary considerations I should be aware of?
Certainly! These Red Velvet Marble Waffles can be easily adapted for various dietary needs. To make them dairy-free, simply substitute buttermilk with a mix of almond milk and vinegar, and use coconut oil instead of butter. For those managing gluten sensitivities, a gluten-free all-purpose flour can be a great substitute. Just ensure your baking powder and other ingredients are certified gluten-free.
Can I make these waffles ahead of time?
Definitely! I often prepare the batter the night before and store it in the refrigerator for up to 24 hours. Just be sure to stir it gently before cooking to maintain the fluffiness. Cooking the waffles fresh in the morning ensures that you get that delightful texture and warm flavors, making breakfast feel extra special!
These are just a few tips to help you create the most delicious Red Velvet Marble Waffles while addressing your potential questions! Enjoy your whimsical breakfast adventure!

Red Velvet Marble Waffles: A Whimsical Breakfast Treat
Ingredients
Equipment
Method
- In a medium bowl, whisk together the ingredients for the classic waffle batter until smooth.
- In a separate bowl, combine the ingredients for the red velvet batter until just mixed.
- Preheat the waffle iron, lightly grease it, and ensure it's ready for cooking.
- Pour alternating spoonfuls of both batters into the waffle iron, swirling them together gently.
- Close the waffle iron and cook until the waffles are golden brown, about 4 to 5 minutes.
- Remove the waffles and serve warm with toppings like whipped cream or fresh berries.

Leave a Reply