As the last rays of sunlight fade and the magic of Halloween night begins to flicker, I can’t help but feel that familiar thrill in my kitchen. This is the time for my Spooky Spider Web Bean Dip, a dish that has become a beloved staple at my autumn gatherings. Not only is this layered dip a showstopper that captures the festive spirit, but it’s also a breeze to whip up—perfect for those busy days leading up to the holiday. Plus, it easily accommodates vegan friends with simple substitutions. With creamy refried beans, fresh guacamole, and a decorative spider web design made from sour cream, this dip is sure to delight guests of all ages. Are you ready to impress your friends with a spine-chilling yet delicious party appetizer? Let’s dive into the recipe!

Why is Spider Web Bean Dip a Must-Try?
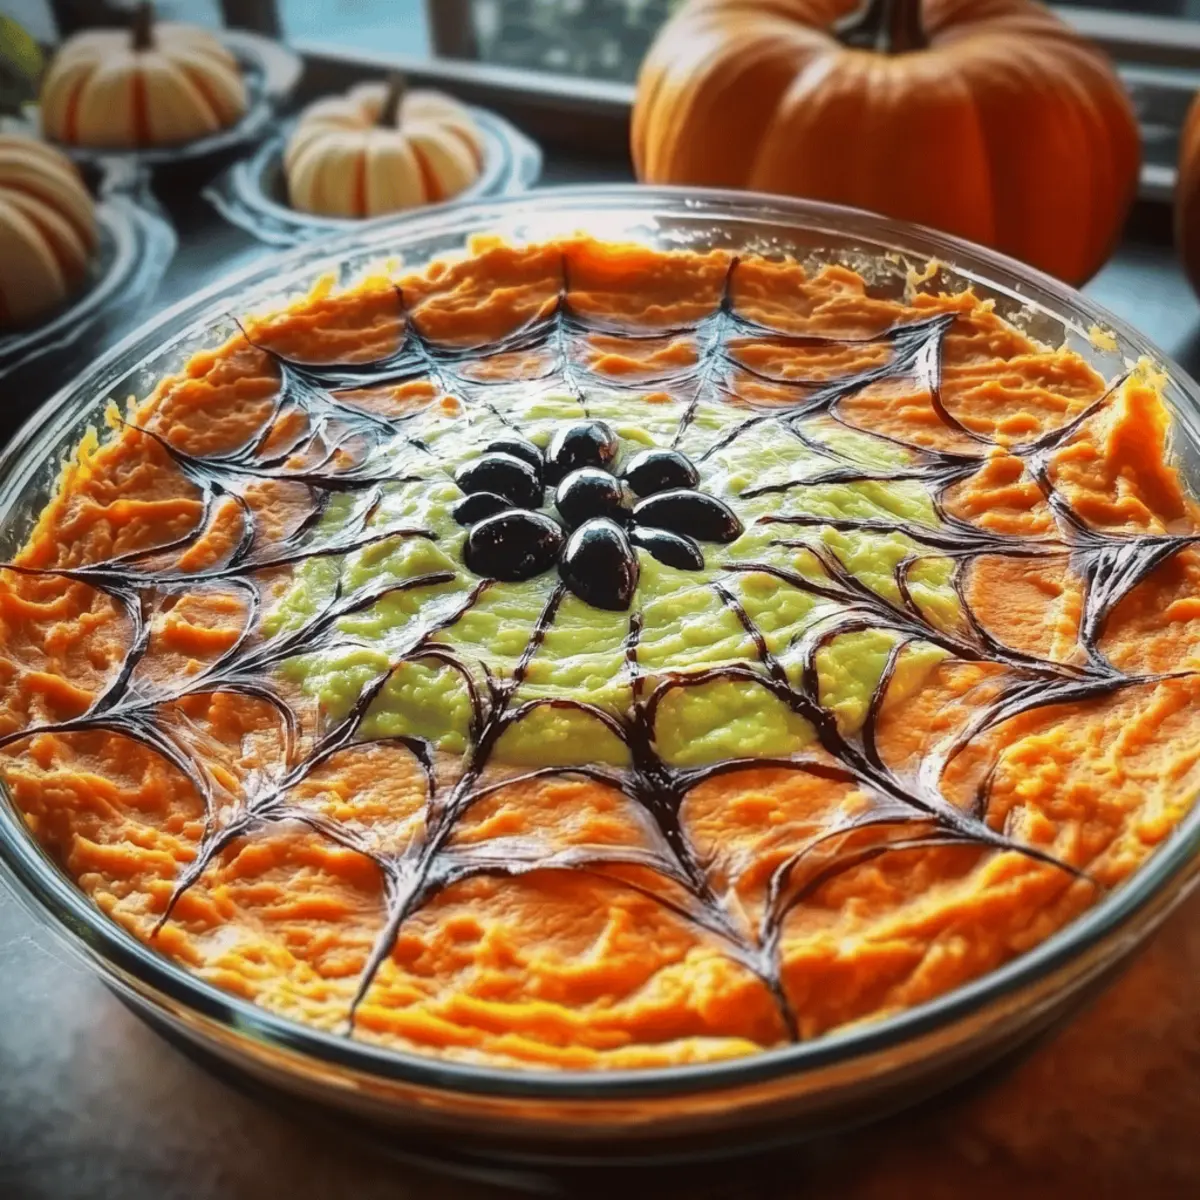
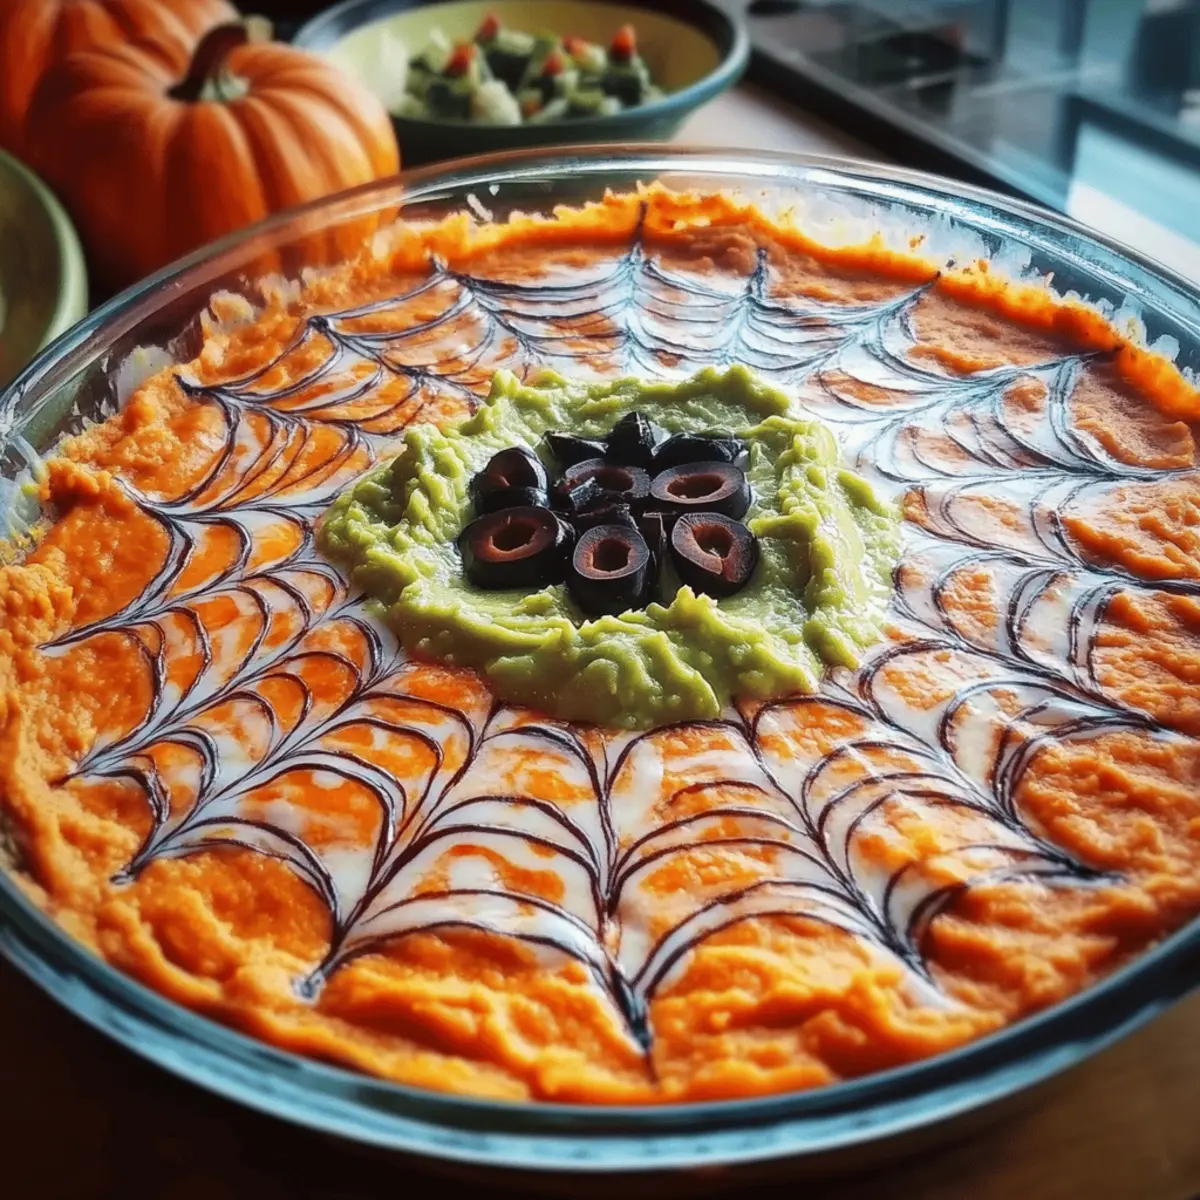
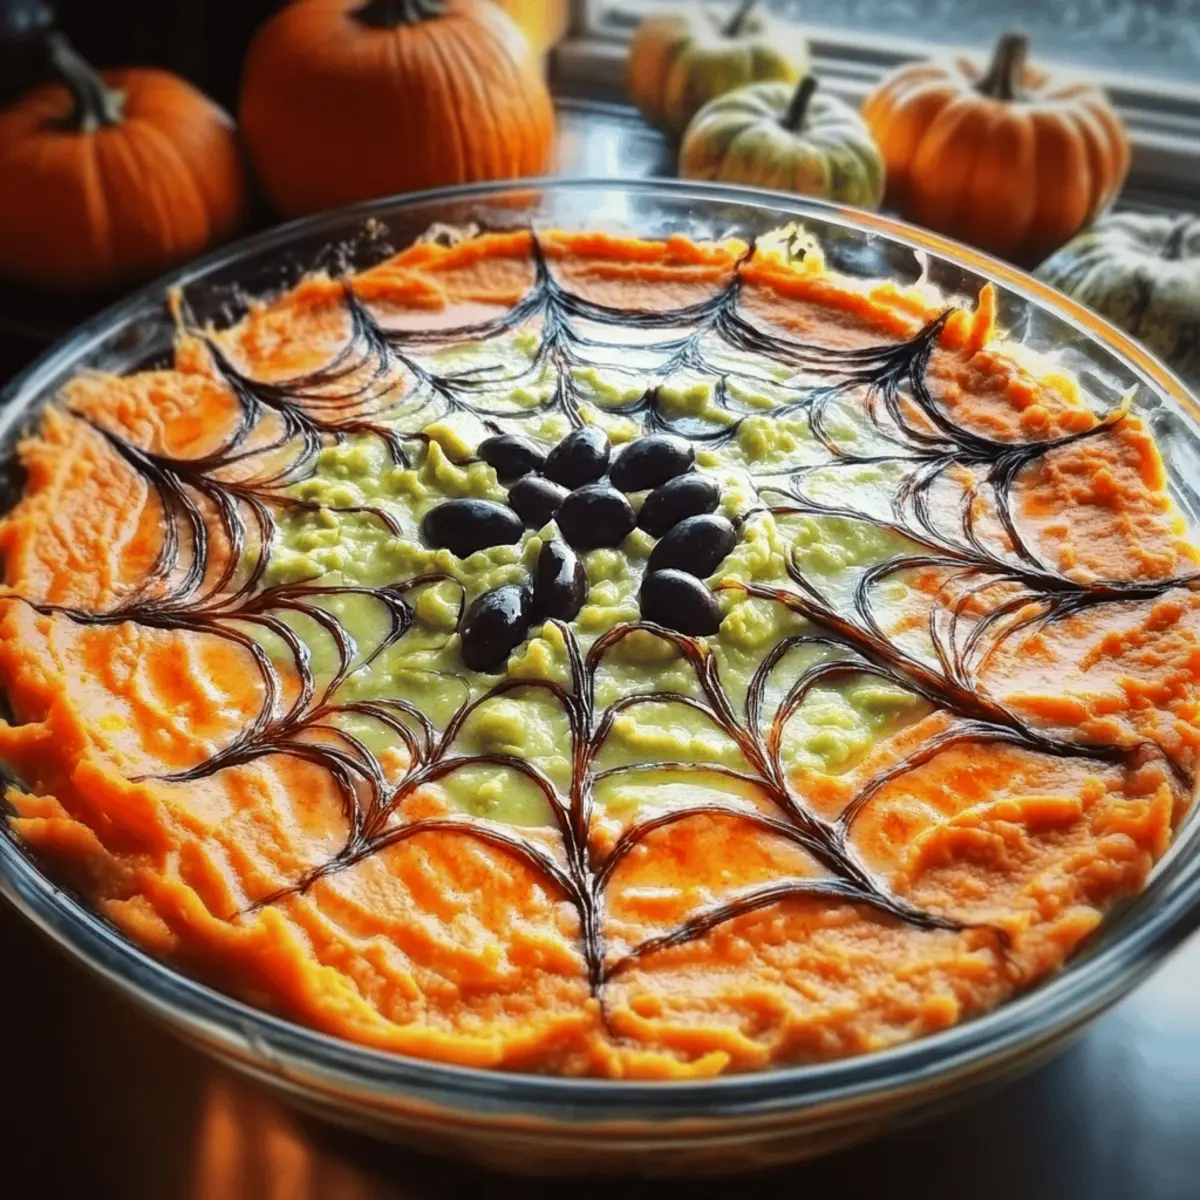
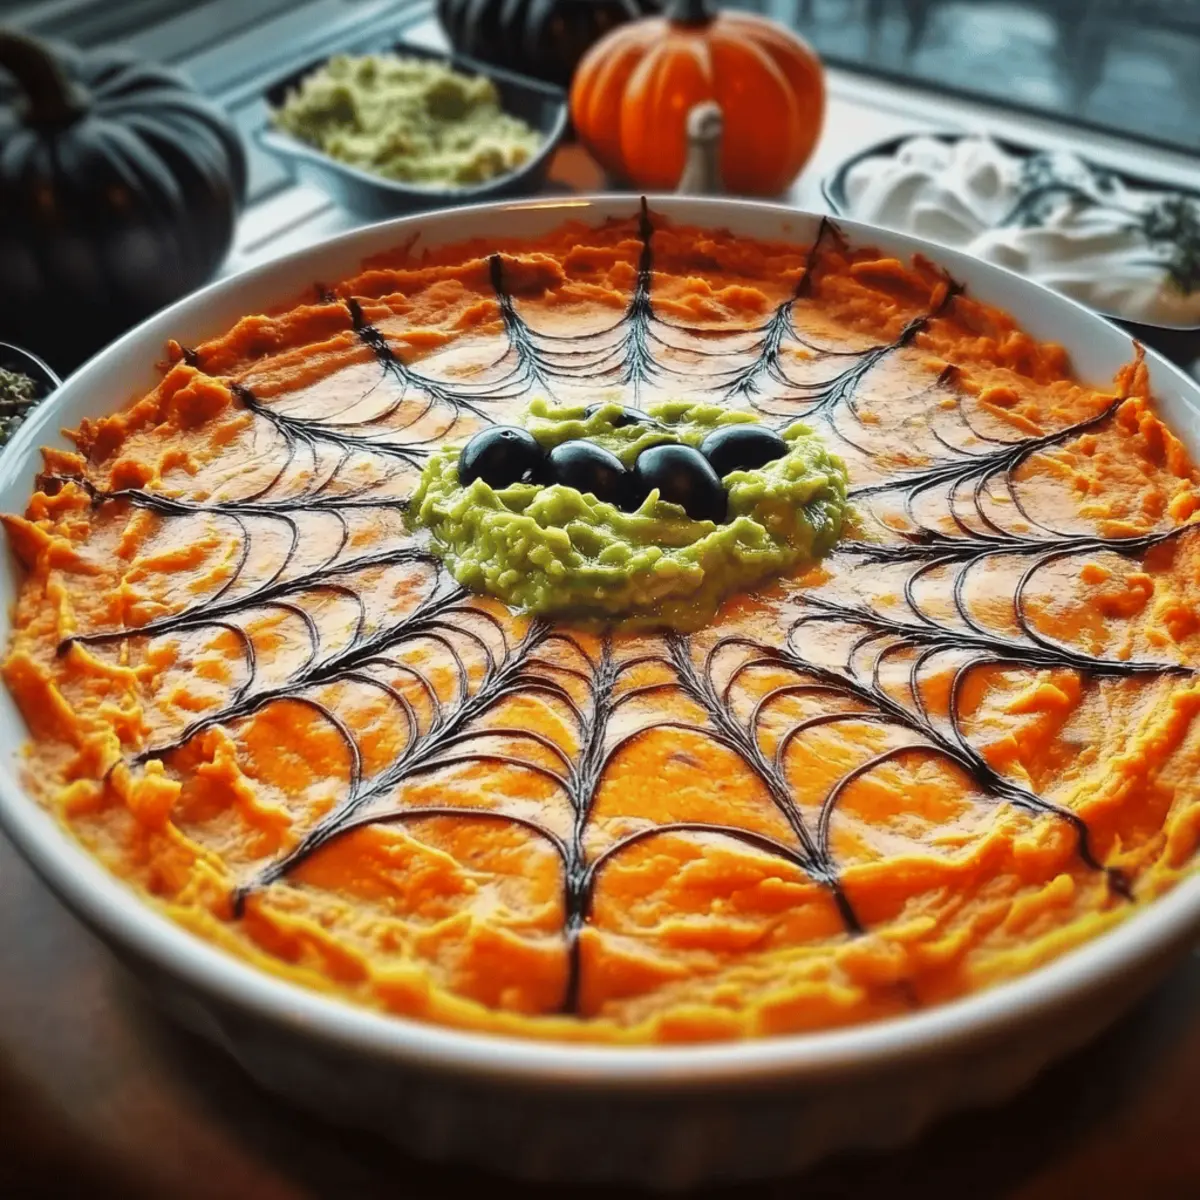
Visual Delight: The spooky spider web design makes this dip an eye-catching centerpiece that sparks conversation.
Flavor Explosion: Layers of creamy refried beans, zesty guacamole, and tangy sour cream create a savory delight that your taste buds will love.
Versatile Options: Easily adapt this recipe for vegan friends! Simply substitute with dairy-free ingredients without compromising on flavor.
Quick and Easy: With minimal prep time, you can whip up this crowd-pleaser in no time, leaving you more moments to enjoy the festivities.
Perfect for Any Gathering: Whether it’s a Halloween party or cozy get-together, this dip is sure to be a hit among guests of all ages.
Pair it with crunchy tortilla chips or veggie sticks for a fun dipping experience, and don’t forget to check out my Whipped Ricotta Dip or Bubbly Baked Dip for more delightful appetizer ideas!
Spider Web Bean Dip Ingredients
For the Base Layers
• Refried Beans – This creamy base layer provides a savory flavor; for a vegan version, use plant-based refried beans.
• Guacamole – Offers a refreshing, creamy layer; ensure plenty of lime juice is mixed in to prevent browning.
• Sour Cream – Adds tanginess and moisture; for a vegan alternative, opt for dairy-free sour cream.
For the Top Layer
• Shredded Cheese – Provides a gooey, savory topping; substitute with dairy-free cheese for a vegan option.
• Olives – Used to create the spooky spider decoration; black olives work best for a striking visual effect.
For Serving
• Tortilla Chips – Perfect for scooping up the dip; alternatively, consider using vibrant vegetable sticks for a healthier option.
This delicious Spider Web Bean Dip is not only a fun centerpiece but also allows for simple substitutions, ensuring everyone can enjoy it.
Step‑by‑Step Instructions for Spider Web Bean Dip
Step 1: Prepare the Base Layer
Start by spreading a generous layer of refried beans onto a shallow serving dish. Use a rubber spatula to evenly distribute the beans, ensuring you cover the bottom entirely. This creamy base sets the tone for your Spider Web Bean Dip, and should be done smoothly—aim for about 5 minutes for this step.
Step 2: Add the Guacamole
Next, take your freshly made or store-bought guacamole and layer it over the refried beans. Smooth it out gently with the spatula to create an even layer about half an inch thick, ensuring no beans are visible. This bright green layer adds a delightful freshness and should take around 3-5 minutes to perfect.
Step 3: Spread the Sour Cream
In this step, thin out your sour cream with a splash of water or lime juice for easy spreading. Carefully layer this over the guacamole using a clean spatula, spreading it evenly to cover the entire surface. The sour cream should be light and fluffy, and this step will take you about 5 minutes to achieve a beautiful presentation.
Step 4: Create the Spider Web Design
Now it’s time to get creative! Fit a piping bag or a zip-top bag with a corner snipped off with thinned sour cream. Pipe concentric circles starting from the center of the dip towards the edges, then drag a toothpick from the center to the outer edges to create a web-like design. This artistic touch makes your Spider Web Bean Dip visually stunning and should take roughly 5-7 minutes.
Step 5: Add the Spider Decoration
To complete your spooky creation, slice black olives into halves and position them in the center of your piped web design to form a creepy spider. Arrange a few additional olive pieces around the spider to enhance the effect and create a fun focal point. This decorating process should take about 3 minutes, so make it as playful as you wish!
Step 6: Chill and Serve
Finally, cover your assembled Spider Web Bean Dip with plastic wrap and refrigerate for at least 30 minutes. This chilling time allows flavors to meld beautifully while keeping the dip fresh. When you’re ready to serve, set out a platter of crunchy tortilla chips or vibrant vegetable sticks for dipping. Aim for a refreshing, chilled serving sensation that your guests will love!

Make Ahead Options
These Spider Web Bean Dip preparations are perfect for busy home cooks looking to save time! You can assemble the base layers—refried beans, guacamole, and sour cream—up to 24 hours in advance. Simply cover the dish tightly with plastic wrap and refrigerate to maintain freshness. To prevent browning, ensure that the guacamole is finished with a good squeeze of lime juice before sealing. When it’s time to dazzle your guests, remember to create the spooky spider web design and add the black olives no more than 1-2 hours before serving. This way, you’ll have a spectacular, crowd-pleasing appetizer that is just as delicious and visually appealing as if it had been prepared fresh!
Expert Tips for Spider Web Bean Dip
• Timing is Key: Assemble the base layers up to 24 hours in advance but pipe the spider web no more than 1-2 hours before serving for maximum visual impact.
• Prevent Browning: To keep guacamole looking fresh, mix in plenty of lime juice and cover it tightly to minimize air exposure.
• Transport Safely: Use toothpicks to tent plastic wrap over your dip if you’re taking it somewhere, ensuring the web design remains undisturbed.
• Layer Smoothly: When spreading layers, take your time to ensure each layer is even and aesthetically pleasing—this creates a beautifully crafted Spider Web Bean Dip.
• Add Spice: For those who enjoy heat, consider mixing in diced jalapeños or a splash of hot sauce in the refried bean layer for a flavorful twist.
Spider Web Bean Dip Variations
Feel free to let your creativity run wild with this easy-to-customize dip, transforming it from Halloween classic to an all-time favorite!
-
Vegan Delight: Swap out dairy sour cream and cheese for vegan alternatives to keep this dish entirely plant-based while still delicious.
-
Spicy Kick: Add diced jalapeños or a splash of hot sauce to the bean layer for an extra punch of flavor that will awaken your taste buds.
-
Fresh Herb Twist: Mix in fresh cilantro or chives into the guacamole for a burst of greenery and flavor that brightens the overall taste.
-
Crunchy Add-Ins: Consider adding roasted corn or diced bell peppers on top for a delightful crunch and vibrant color that makes every bite exciting.
-
Savory Cheese Swap: Try using a blend of smoked Gouda or pepper jack cheese instead of traditional shredded cheese, introducing unique flavor notes.
-
Texture Variation: Incorporate crushed tortilla chips within the layers for an unexpected crunch that complements the creamy layers beautifully.
-
Sweet and Spicy: For an intriguing twist, drizzle a bit of spicy honey over the top just before serving, adding a layer of sweet heat that’s sure to impress.
-
Colorful Layers: Use black beans instead of refried beans for a striking contrast and subtly different flavor, perfect for impressing guests.
These variations not only allow you to cater to dietary preferences but also add layers of flavor and texture! For more delightful appetizer inspiration, check out my Feta Kale Dip or the inviting Mouthwatering Roasted Honeynut Feta Dip.
How to Store and Freeze Spider Web Bean Dip
Fridge: Store any leftover Spider Web Bean Dip in an airtight container for up to 3 days. Make sure to cover the top layer with plastic wrap to prevent it from drying out.
Freezer: While it’s best enjoyed fresh, you can freeze the bean dip without the decorative toppings for up to 2 months. Thaw in the fridge overnight before serving.
Reheating: If using the microwave, heat the dip in short intervals, stirring occasionally until warmed through. Avoid overheating to prevent texture loss.
Make-Ahead: You can prepare the base layers up to 24 hours in advance and keep them refrigerated, but add the decorative web and spider elements right before serving for best presentation.
What to Serve with Spider Web Bean Dip
As you prepare for a delightful evening filled with laughter and festive fun, consider these complementary dishes that enhance the experience.
- Crunchy Tortilla Chips: These classic companions provide the perfect scoop for your dip, adding crunch and a satisfying texture to bite into.
- Veggie Sticks: Offer a colorful array of cucumber, carrots, and bell peppers for a fresh, healthy contrast that balances the creamy dip.
- Spicy Jalapeño Poppers: Add a kick to your feast with these stuffed delights, injecting bursts of flavor that pair wonderfully with the dip’s savory layers.
- Savory Stuffed Mushrooms: These bite-sized treats bring an earthy note and complement the richness of the Spider Web Bean Dip. They’re sure to disappear quickly!
- Chilled White Sangria: A refreshing drink option, this fruity beverage brightens up the table, enhancing the zesty flavors and festive mood of your gathering.
- Pumpkin Spice Mini Cupcakes: For a sweet finish, these Halloween-themed cupcakes add a delightful sweetness that contrasts with the savory dip, rounding out the meal beautifully.
Mix and match these pairings to create a memorable Halloween spread, inviting your guests to indulge in flavor and cheer!

Spider Web Bean Dip Recipe FAQs
What type of beans should I use for the best flavor?
Absolutely! For the creamiest and most flavorful base, I recommend using traditional refried beans. If you’re looking for a vegan option, plant-based refried beans work wonderfully too, ensuring that everyone at your party can indulge.
How long can I store leftover Spider Web Bean Dip in the fridge?
You can keep your leftover Spider Web Bean Dip in an airtight container in the fridge for up to 3 days. Just make sure to cover the top layer with plastic wrap to prevent it from drying out—it’s too delicious to waste!
Can I prepare the dip ahead of time?
Yes! You can assemble the base layers—refried beans, guacamole, and sour cream—up to 24 hours in advance. However, for the best visual impact, create the spider web presentation only within 1-2 hours of serving to maintain that stunning look!
How do I freeze the Spider Web Bean Dip?
While fresh is best, you can indeed freeze the bean dip! Prepare it without the spider web and decoration, and transfer to an airtight container. It will keep well for about 2 months. When you’re ready to enjoy it, thaw it in the fridge overnight and reheat gently in the microwave to preserve the texture.
Is this dip safe for kids and those with allergies?
Very! This Spider Web Bean Dip can easily be made nut-free and can accommodate various dietary needs. Just ensure your ingredients—especially the refried beans, cheese, and sour cream—are labeled dairy-free if making it vegan, and check for allergies like olives if any guests require extra caution. It’s a crowd-pleaser for all ages!
What should I serve with the dip?
I often recommend serving it with crispy tortilla chips for that classic crunch, but feel free to get creative! Bright vegetable sticks like carrots, cucumbers, or bell peppers not only make for healthier options but also add vibrant colors to your presentation.

Mouthwatering Spider Web Bean Dip for Your Halloween Bash
Ingredients
Equipment
Method
- Spread a layer of refried beans onto a shallow serving dish.
- Layer guacamole over the refried beans and smooth it out.
- Thin out sour cream with a splash of water or lime juice and layer it over the guacamole.
- Pipe concentric circles with thinned sour cream and drag a toothpick to create the spider web design.
- Slice black olives and arrange them in the center of the web to create a spider decoration.
- Cover the dip with plastic wrap and refrigerate for at least 30 minutes before serving.

Leave a Reply